下面是生成自签证书的过程:
1.生成密钥
openssl genrsa -out test.com.key 2048
2.生成证书请求文件,运行之后会出现一大堆要输入的东西,输入之后就生成.csr的文件了
openssl req -new -key test.com.key -out test.com.csr
You are about to be asked to enter information that will be incorporated
into your certificate request.
What you are about to enter is what is called a Distinguished Name or a DN.
There are quite a few fields but you can leave some blank
For some fields there will be a default value,
If you enter ‘.’, the field will be left blank.
—–
Country Name (2 letter code) [XX]:CN
State or Province Name (full name) []:Beijing
Locality Name (eg, city) [Default City]:Beijing
Organization Name (eg, company) [Default Company Ltd]:test.com
Organizational Unit Name (eg, section) []:test
Common Name (eg, your name or your server’s hostname) []:www.test.com
Email Address []:root@test.com
Please enter the following ‘extra’ attributes
to be sent with your certificate request
A challenge password []:123456
An optional company name []:test
3.生成证书crt
openssl x509 -req -days 365 -in test.com.csr -signkey test.com.key -out test.com.crt
4.复制文件到相应的目录
cp test.com.crt /etc/pki/tls/certs
cp test.com.key /etc/pki/tls/private/
cp test.com.csr /etc/pki/tls/private/
5.修改配置文件
vim /etc/httpd/conf.d/ssl.conf
SSLCertificateFile /etc/pki/tls/certs/test.com.crt
SSLCertificateKeyFile /etc/pki/tls/private/test.com.key
6.重启apache
service httpd restart
7.这时再使用https访问,查看证书详情的时候就会看到
Issued to: www.test.com
Issued by: www.test.com
颁发者: www.test.com
颁发给: www.test.com
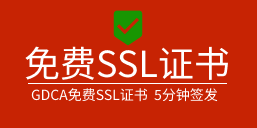
自签名HTTPS证书可以随意签发,没有第三方监督审核,不受浏览器信任,常被用于伪造证书进行中间人攻击,劫持SSL加密流量。很多软件开发商为了节约成本,采用自签名SSL证书,其实是给自己的产品埋下了安全隐患,随时可能被不法份子利用。如果处于成本考虑,建议去GDCA申请免费的HTTPS证书来使用。
附免费DV证书申请网址:https://www.sslsq.com/free-ssl

GDCA专注于网络信息安全领域,通过了WebTrust 的国际认证,具备国际化电子认证服务能力,是全球可信的证书签发机构。GDCA签发的证书有SSL证书、代码签名证书、PDF证书,还有SSL硬件产品。更多证书资讯,请关注https://www.sslsq.com。